Choosing the right Rock Hammer Drill is less about chasing the highest impact rating. It is about matching the tool to the rock, workload, operator, and jobsite conditions. Granite, fractured limestone, and old concrete demand different drilling behavior. A powerful drill may perform beautifully in hard stone, yet feel excessive during lighter masonry work. That mismatch can increase fatigue, bit wear, noise, and operating costs.
Dr. Robert G. Hustrulid, a respected mining engineer and rock mechanics authority, has emphasized this practical principle: “Rock conditions dictate drilling performance.” The statement is simple, but easy to overlook. Before buying, examine impact energy, rotation speed, chuck type, vibration control, dust management, power source, and service support. Hold the tool if possible. Notice its balance. Imagine guiding it against a rough wall while concrete dust settles across your gloves.
The best choice also depends on honest self-assessment. Are you drilling occasional anchor holes, or working through dense rock every day? A compact cordless model may offer mobility, but its battery could disappoint during extended work. A corded model may deliver steady power, though the cable becomes awkward around uneven ground. Some specifications look impressive on paper. They may not reflect real drilling speed.
These ten tips will help compare performance, durability, safety features, and long-term value. They will not remove every uncertainty. No buying guide can predict every rock layer. However, careful selection can prevent an expensive mistake before the first hole is drilled.
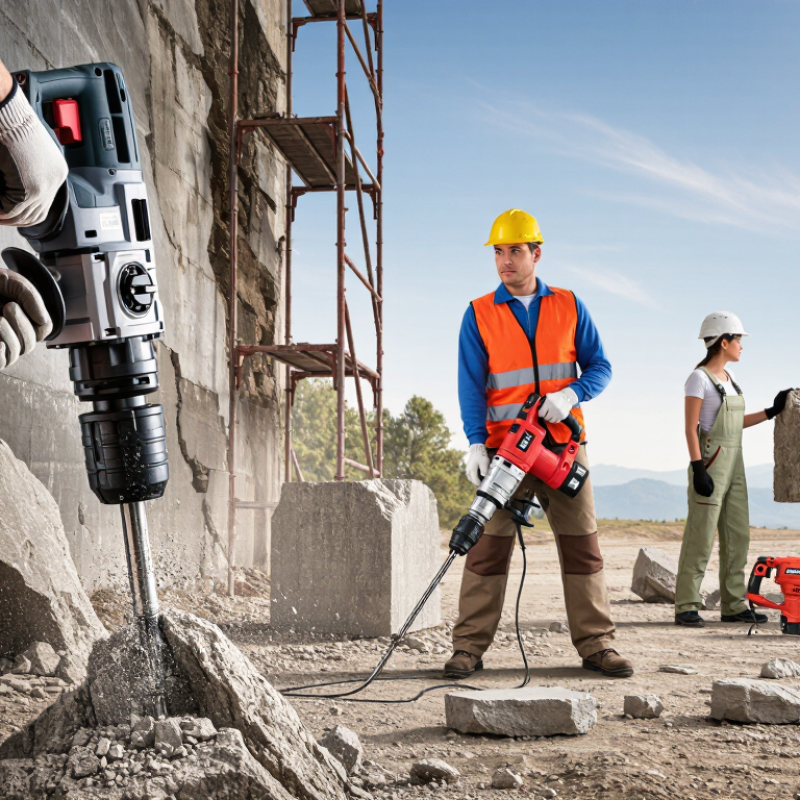
Before choosing a rock hammer drill, define its main task clearly. Will it drill granite, concrete, fractured stone, or mixed ground? Each material changes the required impact energy, rotation speed, and bit design. A tool for occasional anchor holes is different from one used for continuous quarry or construction work.
Measure the expected hole diameter and depth. Small holes may need controlled impact, while deep holes demand steady power and effective debris removal. Consider the work position too. Overhead drilling increases fatigue, especially when the tool is heavy or strongly vibrating. In field conditions, dust can quickly block ventilation openings, so sealed controls and accessible cleaning points matter. Wet locations require suitable electrical protection and careful inspection. Do not assume “heavy-duty” means suitable for every environment.
Working conditions also include daily workload. Estimate drilling time per shift, restart frequency, and the operator’s available strength. A hammer drill that performs well for ten minutes may become uncomfortable after several hours. Noise and vibration should be checked against applicable workplace requirements. Dust extraction may be essential indoors, particularly when drilling mineral materials. I have seen selection decisions focus on impact power while ignoring balance and maintenance access. That approach looks efficient on paper, but it can slow the crew later. Leave room for uncertainty. Rock hardness can vary within one wall, and real performance may differ from laboratory figures. –
10 Tips for Choosing the Best Rock Hammer Drill
Compare Drilling Power, Impact Rate, and Rotation Speed
Choosing a rock hammer drill starts with power, but power alone can mislead you. I compare rated input power with actual drilling performance in granite, concrete, and dense stone. A strong motor should keep the bit moving when pressure increases. If the motor slows sharply, the tool may feel powerful only on paper. Match the drill’s capacity to your usual hole size, not an occasional oversized task.
Impact rate controls how quickly the mechanism strikes the material. A high impact rate can speed work on hard rock, yet excessive impacts may wear bits faster. For a 20-millimeter hole, I look for steady impacts rather than the highest number. The handle should remain controllable when dust covers the work area. It should not jump violently against your wrists. Short tests help, but longer drilling exposes heat buildup and vibration.
Rotation speed affects cutting efficiency and bit life. Faster rotation suits softer masonry, while slower rotation often gives better control in hard rock. Check whether the speed can be adjusted with a trigger or selector. A useful drill also maintains rotation under load. I once chose a model with impressive impact figures and ignored its weak speed control. That mistake caused uneven holes and unnecessary bit wear. Consider the clutch, cooling system, vibration control, and service support before deciding. No single specification tells the whole story.
| Tip | What to Compare | Typical Specification Range | Why It Matters | Recommended Selection Guidance |
|---|---|---|---|---|
| 1 | Match drilling power to rock hardness | Input power: approximately 700–1,500 W for corded tools; battery models are commonly rated by voltage and output energy. | Hard rock requires sufficient motor power to maintain performance under load and reduce stalling. | Choose the lower end for occasional masonry work and the higher end for frequent drilling in dense stone or concrete. |
| 2 | Check impact energy | Impact energy: approximately 2–12 J for rotary hammer drills, depending on tool class. | Impact energy determines how effectively the bit fractures hard material during hammer drilling. | Use about 2–5 J for light- to medium-duty holes and about 5–12 J for larger holes or continuous work in hard rock. |
| 3 | Compare impact rate | Impact rate: approximately 1,000–5,000 blows per minute (BPM). | A higher impact rate can improve drilling speed in suitable materials, while excessive impact may increase wear and vibration. | Select an adjustable impact rate so the tool can be tuned for different rock densities and bit diameters. |
| 4 | Evaluate rotation speed | No-load speed: approximately 0–1,200 revolutions per minute (RPM) for many rotary hammer drills. | Rotation speed helps clear material and control drilling efficiency, but very high speed can overheat large bits. | Prioritize variable-speed control and use lower RPM for large-diameter bits or abrasive rock. |
| 5 | Consider maximum drilling diameter | Typical concrete or rock capacity: approximately 20–40 mm for compact tools and up to 50–80 mm for heavier models. | The maximum rated diameter indicates the bit size the mechanism can handle safely and effectively. | Choose a tool with a capacity at least 20% greater than your largest planned hole to avoid operating at its limit. |
| 6 | Select the correct chuck and bit system | Common systems include SDS-Plus for lighter applications and SDS-Max for higher impact energy and larger bits. | The chuck system affects bit compatibility, impact transfer, maximum hole size, and accessory availability. | Use SDS-Plus for general installation holes and SDS-Max when drilling large holes or working for extended periods in hard rock. |
| 7 | Check speed and torque control | Useful controls include variable trigger speed, electronic speed regulation, overload protection, and reverse rotation. | Electronic control helps maintain consistent speed, protect the motor, and reduce damage when the bit binds. | Choose a model with a responsive variable-speed trigger and overload protection for safer, more controlled drilling. |
| 8 | Assess vibration control | Look for an anti-vibration side handle, isolated motor housing, or active vibration-reduction system. | Lower vibration improves comfort, control, and practical working time, especially during repeated drilling. | For frequent or long-duration work, prioritize vibration-reduction features over a small increase in no-load speed. |
| 9 | Balance tool weight and duty cycle | Approximate tool weight: 2.5–5 kg for compact models and 5–10 kg for heavy-duty models. | Heavier tools may deliver greater impact energy, but they can cause faster operator fatigue and reduce handling precision. | Select the lightest tool that meets the required impact energy and drilling diameter for the intended duty cycle. |
| 10 | Verify cooling, maintenance, and safety features | Important features include thermal overload protection, sealed bearings, service indicators, a safety clutch, and a lock-on control. | Heat management and mechanical protection improve reliability when drilling abrasive or particularly hard rock. | For demanding work, choose a tool with thermal protection and a torque-limiting clutch, and follow the specified lubrication and inspection schedule. |
Choosing a rock hammer drill starts with its chuck, not its advertised power. A chuck is the drill’s handshake with the bit. For light masonry, a compact slotted chuck accepts common smaller bits and changes quickly. Heavier work may need a larger slotted system for thick concrete bits. A keyed or keyless chuck can hold smooth-shank bits, but it may not transfer impact efficiently. Check the tool manual before buying adapters. I once assumed two similar-looking sockets were compatible. They were not. That mistake cost time and damaged a bit.
Bit compatibility affects safety, speed, and hole quality. Match the bit shank, diameter range, length, and intended material. Concrete bits are not automatically suitable for granite or dense reinforced masonry. Look for reinforced heads and a length that reaches the target without excessive flex. Use hammer-only mode for chisels, rotary hammer mode for holes, and rotation-only mode for smooth-shank accessories, if supported. Do not force it. Excess pressure can overheat the motor and produce uneven holes.
Drilling capacity should reflect real work, not the maximum catalog number. Compare rated diameters in concrete, brick, and natural stone. A drill rated for 26-millimeter holes may struggle with continuous drilling at that size. Dust, aggregate, and operator pressure change performance. I prefer leaving a margin and choosing a tool below its stated limit. Check impact energy, duty cycle, vibration control, and side-handle grip. More power is not always better. A lighter drill can be more accurate overhead. Test chuck fit and bit runout before starting.
Chuck type determines which bits a rock hammer drill can accept and how much drilling capacity it can handle. SDS-Plus is suited to lighter masonry work, while SDS-Max, spline, and hex systems support progressively larger bits and heavier-duty applications. The figures show representative maximum hole diameters in concrete; actual capacity depends on motor power, impact energy, bit design, drilling depth, and material hardness.
10 Tips for Choosing the Best Rock Hammer Drill
Durability starts with the worksite, not the product label. I used to equate extra weight with strength; that shortcut was wrong. A well-balanced drill with sealed bearings, a reinforced chuck, and replaceable wear parts can survive repeated impacts better. Check service instructions before buying. The tool should also handle dust, heat, and long drilling cycles without frequent shutdowns.
Ergonomics affects accuracy and fatigue. Choose a drill with a comfortable side handle, a centered grip, and controls reachable without twisting your wrist. Anti-vibration systems matter during long sessions. The UK Health and Safety Executive sets an exposure action value of 2.5 m/s² A(8) for hand-arm vibration, with a limit value of 5 m/s². Compare the manufacturer’s measured vibration data, not vague comfort claims. A lighter tool may reduce strain, but poor balance can still exhaust the operator.
Safety features deserve close inspection. A mechanical clutch can reduce sudden kickback when the bit jams. Thermal overload protection helps prevent motor damage during heavy work. Dust extraction is essential when drilling silica-containing rock. OSHA’s respirable crystalline silica standard sets a permissible exposure limit of 50 micrograms per cubic meter over eight hours. Clean the vents, inspect cords and handles, and lubricate the chuck as instructed. I have overlooked maintenance before; small neglect becomes expensive quickly. Test the safety controls before every demanding job.
10 Tips for Choosing the Best Rock Hammer Drill
A low purchase price can hide expensive downtime. Compare the full ownership cost, not only the checkout figure. The U.S. Department of Energy reports that motor-driven systems consume more than half of industrial electricity in the United States. A drill with efficient power transmission may reduce energy waste during repeated breaking work. Check input power, impact energy, duty cycle, and vibration ratings together. One impressive number proves little.
Service support matters on dusty, remote sites. Review spare-part availability, repair turnaround, warranty coverage, and technician training. The Equipment Leasing & Finance Foundation’s 2024 outlook shows that businesses continue treating equipment investment as a major operating decision. That supports a practical rule: calculate cost per working hour. Include bits, lubricants, filters, transport, electricity, scheduled service, and lost production. A cheaper tool may lose that comparison quickly. Maybe.
Industry guidance from the International Organization for Standardization emphasizes documented maintenance and risk control for machinery. Ask for inspection intervals and clear service records. Test the drill on representative rock, if possible. Notice heat near the housing, unstable impact rhythm, and awkward grip pressure. Small discomfort becomes fatigue after several hours. Brand reputation helps, but local support is more valuable when a seal fails on Friday. I would also question optimistic productivity claims. Measure actual holes or broken volume per hour, then compare repair invoices after several months. That evidence is less glamorous, but more reliable.
Compare rated input power with actual performance in granite, concrete, and dense stone. A strong motor should keep the bit moving under pressure. Numbers can mislead.
Impact rate controls how quickly the mechanism strikes the material. Higher impacts may speed hard-rock drilling, but they can wear bits faster. Steady impacts matter more than maximum figures.
Faster rotation often suits softer masonry. Slower rotation usually gives better control in hard rock. Choose adjustable speed control when possible. I once ignored this detail. The holes became uneven.
Match the chuck to the bit shank and intended work. Compact slotted chucks suit smaller masonry bits. Larger slotted systems handle heavier concrete bits. A keyed or keyless chuck may hold smooth-shank accessories, but impact transfer can be weaker.
Check the shank type, diameter range, length, and target material. A concrete bit is not automatically suitable for granite. The bit should reach the hole without excessive flex. Do not force it.
No. Compare realistic diameters for concrete, brick, and natural stone. A drill rated for a 26-millimeter hole may struggle continuously at that size. Leave a practical margin. Catalog limits are not daily performance.
Hammer-only mode suits chisels. Rotary hammer mode suits drilling holes. Rotation-only mode can suit smooth-shank accessories, if supported. Check the manual before changing modes.
Consider the clutch, cooling system, duty cycle, vibration control, and side handle. Dust and operator pressure affect performance. A lighter drill may improve overhead accuracy. Test chuck fit and bit runout before drilling.
Choosing the best Rock Hammer Drill begins with understanding your main tasks and working conditions. Consider whether you will drill into concrete, stone, masonry, or other hard materials, and select a tool suited to the job’s frequency and environment. Compare drilling power, impact rate, and rotation speed to ensure efficient performance without sacrificing control. The chuck type, compatible bit sizes, and maximum drilling capacity should also match your projects and preferred accessories.
Durability and user comfort are equally important for long-term results. Look for strong construction, balanced handling, effective vibration control, reliable safety features, and easy maintenance access. A practical Rock Hammer Drill should reduce fatigue while offering dependable operation during demanding work. Finally, evaluate overall tool quality, available customer support, warranty coverage, replacement parts, and energy or accessory costs. Choosing based on total ownership cost—not just the initial price—can help you invest in a reliable tool that delivers consistent performance over time.

KAT DRILLING